After the family was all on their way home yesterday, I had a chance to sit and color for a while using a digi image from Whimsy Stamps.

Papers are from October Afternoon Good Cheer line.
2 down. A few more to go. LOL
See you soon!
HB


 The coffee cup is paper-pieced and attached to the kraft layer. Once attached, I cut a slit at the top of the cup (under the *cover*) for the gift card to slide into.
 This easy peasy card uses an OA journal card along with a Papertrey sentiment and die.
 I've been working on tags for treat bags for the office over the last couple weeks. 20 in all! (have I said I am so not a good mass producer!?!)
 They will be tied to bags of homemade white chocolate popcorn. YUM.

 The silhouette stamp (Flourishes) is perfect for this challenge. Notice I even found the dictionary page that starts with the word "Fish"! Attention to detail my friends. LOL
 Gold cardstock was put on the back of each house for some light in the windows.


Don't you just LOVE when your Copic makers match the pattern paper so perfectly? *sigh*
I hope you are having a wonderful weekend!
HB
 The layout is last weeks sketch challenge (SC342) over on SCS. I love it's simplicity, and yet you can really pile on the stuff to make it all that and more!
 The large butterfly and the embossed background of the medium sized ones are from the Discover your Wings set (Taylored Expressions). The sentiment is from Miracles Blossom (Verve) and the little butterflies are from a couple Martha Stewart punches.
 I used the Sweet Sunday sketch (#126) and my new Authentique papers. The stamp is from Unity. I left the front "sentiment free" because a. I couldn't figure out where to put it and b. because then I could use this card for anything.
 The houses are Tim Holtz, the tree is Memory Box and the cloud is Papertrey Inc. I love how such varied products can all work together! The sentiment is Market Street Stamps.
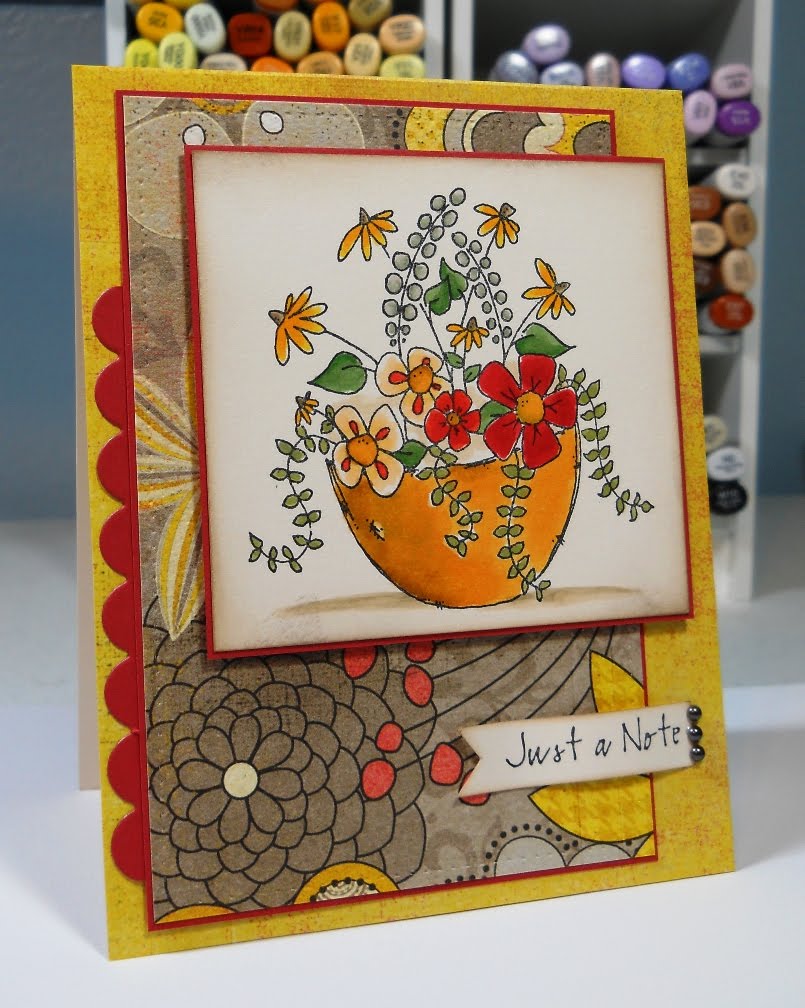 I pulled out one of my favorite Whipper Snapper stamps (Basket of Blooms) and the whole thing just came together (don't ya love when that happens?).
 The Tall Sundae (Whipper Snapper) is stamped, colored with Copic markers and cut out. It's mounted with foam tape on a tag (Simple Stories).


 The second card uses Make a Wish additions stamp set along with the coordinating die set (all PTI) and a Fiskars embossing plate and border punch. The papers are Basic Grey.
 It's suppose to be a beauty of a day here in MN. I hope you have the same!
 Isn't that hedgie the cutest ever? I stamped the image on white cardstock and die cut with a big scallop circle Nestabilities. I stamped a second time and cut out just the petals of the flower. After coloring with various shades of yellow Copics, I cut them out and attached just the tip with a bit of glue. I curled the ends of the petals with a bone folder.
 I didn't have a tag die that fit this little space, so I used a Nestabilities tag and after I die cut it, I re-cut it, putting the tag half way down to cut off the end, but still give me that wonderful edge that Nesties give. I ran a Copic around the edge for color and then added glitter.
 He originally had a bird flying over his nose, but since the sentiment (Penny Black) I was going to use had "butterflies" in it, I masked the bird before I stamped and then added a little butterfly and the trail so it looks like he flew right off the hedgehog's nose.
  I love this tent topper layout - originally created by Mish!
 *happy* is from the new Wonderful Words die set. *everything* is from the matching stamp set (both PTI). The flower is a MTF die-namics die using PTI felt (that stuff cuts like butter!).
 Papers are from my new favorite line... Life of the Party (My Minds Eye) and Little Yellow Bicycle. The little flower is made with a mini rolled rose Die-namics die (MFT) and has a pearl center. The leaves are cut free-hand.
 I stamped the cupcake with Berry Sorbet (PTI), cut it out and then covered the base in glitter. I frosted the cupcake with my pearl Viva Decor pen. It looks like old fashioned seven-minute frosting! A few sprinkles of glitter and it looked good enough to eat!
 I stamped the image on pink cardstock and then colored it in with Copic markers. I was amazed at how well I was able to color and shade on a colored cardstock!
 After coloring the bunch of flowers in shades of yellow with Copic markers, I filled the centers with a little dot from my bronze pearl pen (Viva Decor). I love those things!
 I used October Afternoon paper (Campfire line) and paired it with various colored cardstock. Stars are safe for guys, right?
 It really makes a pretty little card to send to someone... just to let them know you're thinking of them. I could use a bunch of these. lol
 A couple months ago I was browsing around SCS and came across THIS beauty by Stampit74. The image looks so much like Elise that I had to order the stamp (C.C Designs). I copied the original card by replacing the pumpkin with the number.
 Thanks for stopping by. I'm off to have cake with the cutest 4 year old I know!
 I had an "ahaaa" moment yesterday. I was looking at my new button dies from PTI and thought "I wonder if the size works with the Everyday Button Bits set?". Sure enough!


 .
.


